


The Farmer's Wife's Field Guide to Animal By-Products.
Ready to see lots more pictures?! Trust me. Seeing it will help you visualize each step along the way.
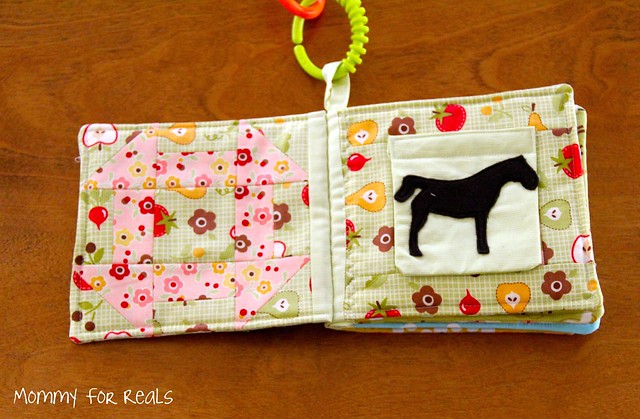
The horse becomes glue.
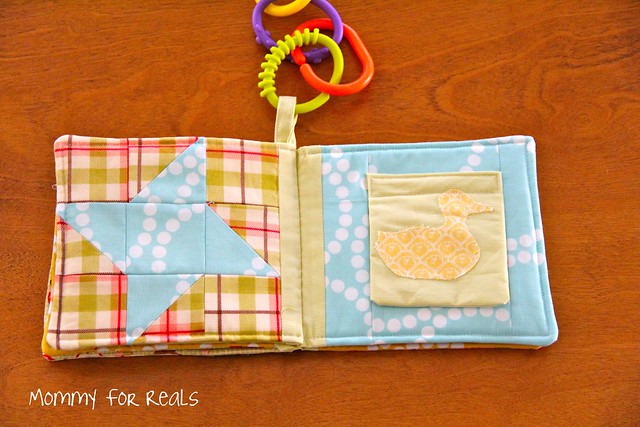
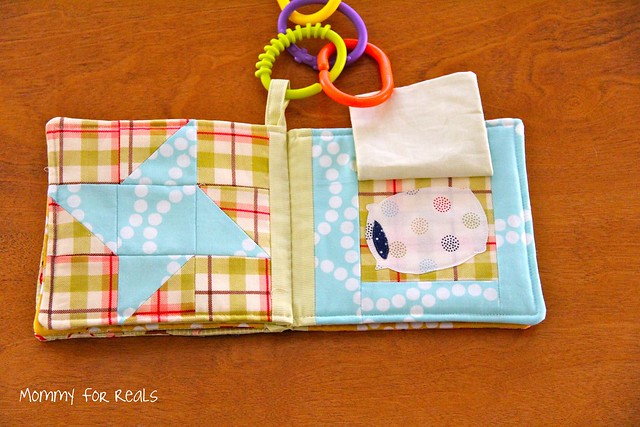
The duck becomes a feather pillow.


The sheep becomes a sweater... maybe of the wool variety??
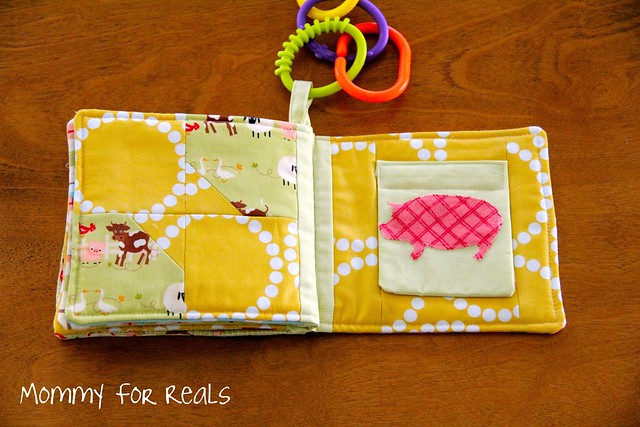

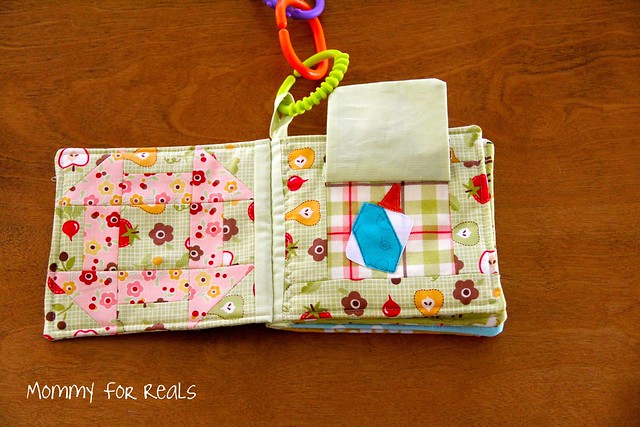
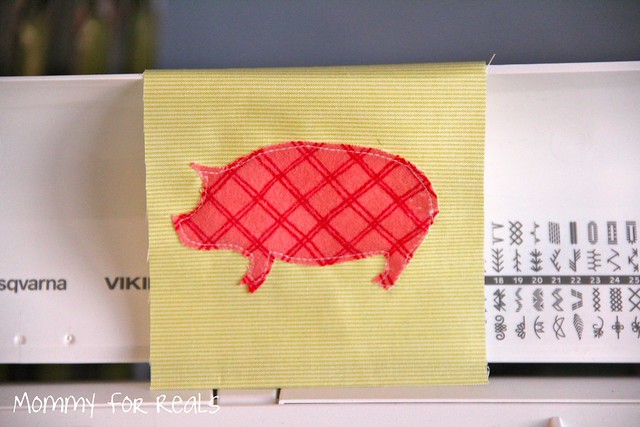
And, of course, the pig become bacon!!
You will need to start with four Farmer's Wife blocks. If you are interested in learning how to make these blocks, check out The Farmer's Wife Sampler Quilt by Laurie Aaron Hird (Did you hear that she's going to be one of the judges for this series?! So amazing!) I, unfortunately, am not one of the cool kids and I DON'T have Laurie's book. :( So instead, I used my iPhone app, Quick and Easy Quilt Block Tool. Please remember you can still join in the fun if you don't know how to make Farmer's Wife blocks. Any 6" blocks are fine for this series!

I used Churn Dash, Bow Tie, Sawtooth Star and Friendship Star.
I also chose to use Riley Blake's Farm Fresh line for this project. It's so perfect, don't you think?? I supplemented with some Lizzy House Pearls and Just Wing It by MoMo.
This book is made up of two solid squares for the cover and back, Farmer's Wife blocks for the left side pages and framed square blocks for the right side pages. Since you already have the Farmer's Wife blocks, we will start by constructing the framed square blocks.
Please note: Unless otherwise stated, all seam allowances are 1/4".
For each of these blocks you will need:
One 4" square cut of fabric for the center
Two 4" x 2" rectangles of the framing fabric
Two 7.5" x 2" rectangles of the framing fabric
Assemble as follows:

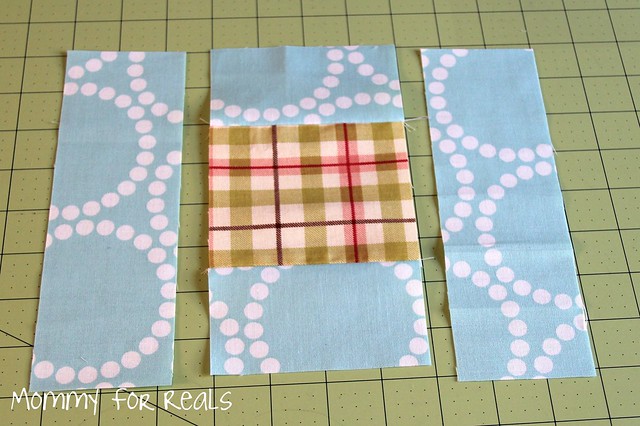

Square them up and repeat for as many pages as you are going to have in your book. For my book, I made four.
Next, cut two 6.5" squares for the cover and the back. You will have 10 squares total now.

What's a baby book without liftable flaps?! To make the flaps, you will need to cut two pieces of fabric for each page you will have a flap on. The dimensions should be 4" x 4.5". I cut 8 of these since I have 4 pages that will need flaps.
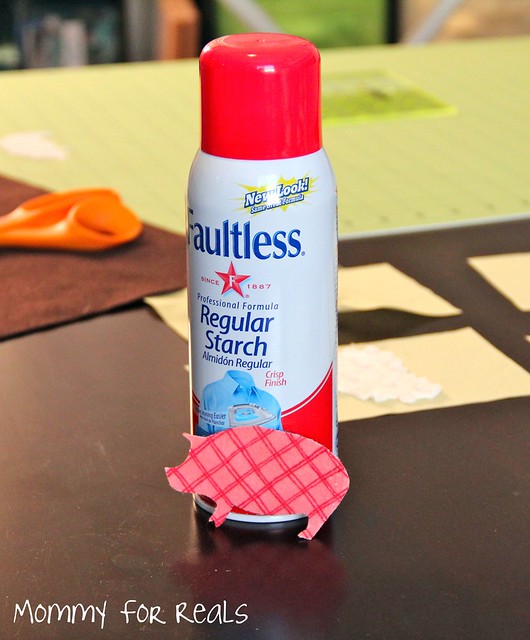
Now, on to the appliqués! I've created a PDF of my drawings if you would like to use them to create your baby book. You can create your appliqués any way you would like. Some people like to starch the heck out of the appliqués then stitch them down, and other people like to use Heat N Bond, or another brand of fusible webbing. Use whichever you'd like.
I used freezer paper and starch.

Place the animal appliqués where you would like them stitched to make sure everything fits. Don't start on the other appliqués yet. I'll give you more instruction on those in a bit.
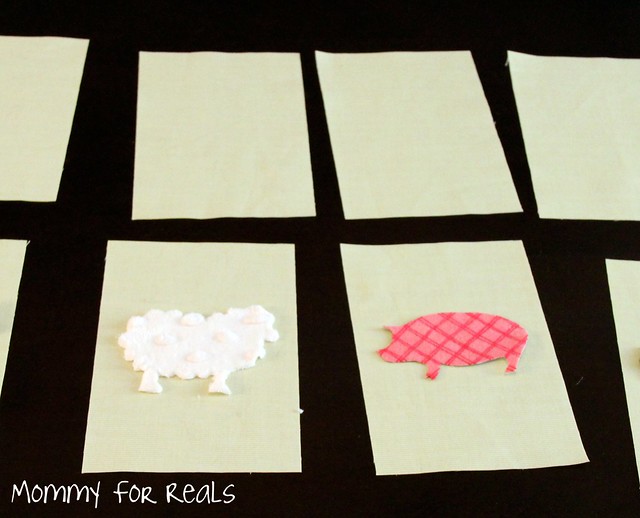
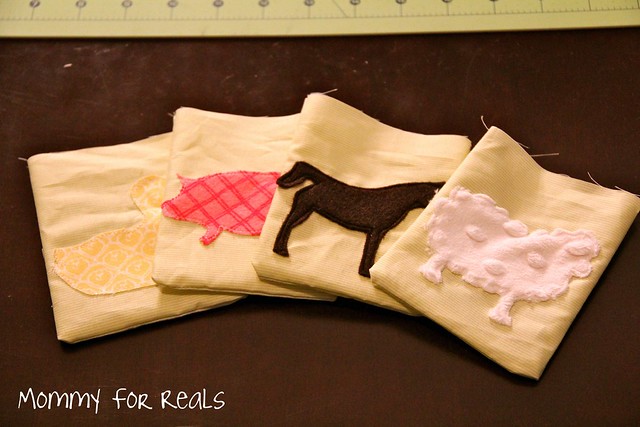
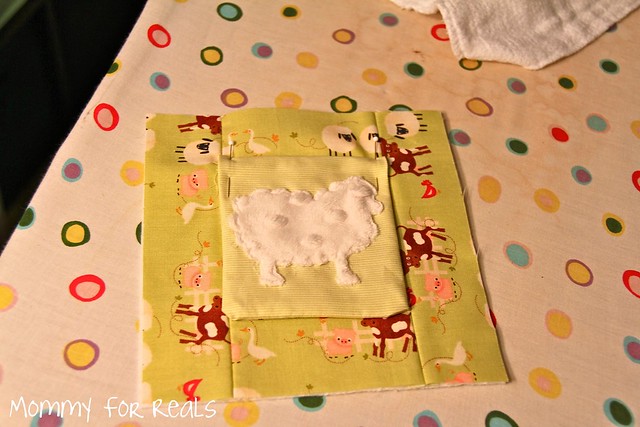
Stitch down the animal appliqués onto each flap front. I have four animals: a horse (which I cut from felt), a duck (cut from quilting cotton), a sheep (cut from minky), and a pig (cut from flannel). I wanted them to each have a different texture. Just so you know, my felt melted under the iron, so try not to iron it unless you have nicer felt that won't do that!
I chose to use raw edge appliqué throughout this project.
Now, you need something crinkly! I used a bag that used to hold my Raisin Bran cereal. Baby wipe refill bags also work great for this.

Cut one piece of the bag to the size of the flap pieces for each flap. So, you will end up with TWO fabric pieces, one with an animal appliqué and one without, and ONE piece of cereal bag crunchy, crinkly stuff. In case you don't remember, we cut these pieces to 4" x 4.5".
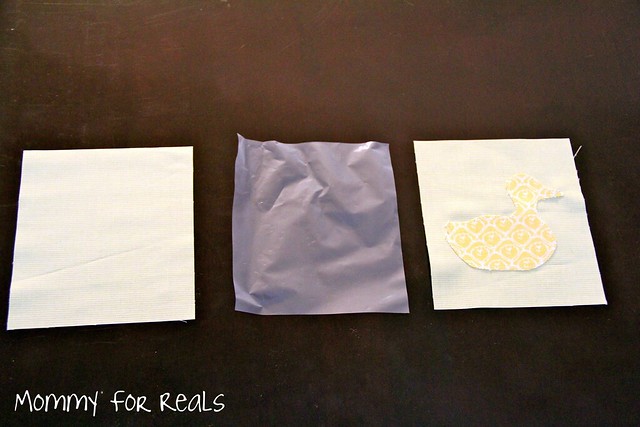
Layer the pieces in this order: Flap back FACE UP. Flap front FACE DOWN. Crinkle bag. Stitch around the two sides and bottom, meaning the edge above the animal appliqué should remain open for turning. Save yourself time. Just leave the whole side open.

Cut the corners and turn. You will end up with four flaps.
Set the flaps aside. We'll come back to them later.
Let's move on to the appliquéd pages. For this part, I used fusible webbing for my appliqués because I needed them to stay in place. Iron the appliqués to the center of the framed square blocks but DO NOT STITCH YET! Once all your appliqués are in place, set aside. You should also appliqué the cover here.
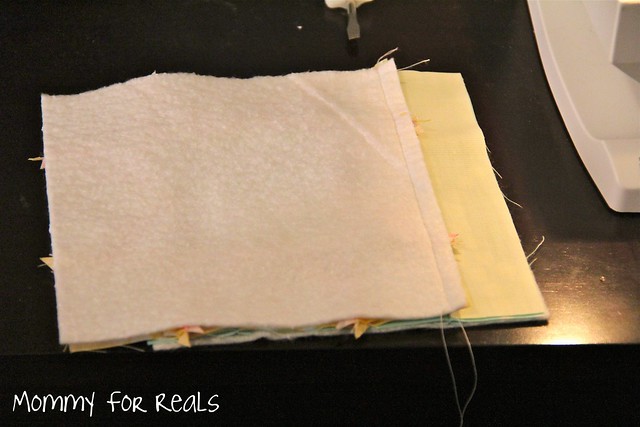
To give your book some fluff, you will need batting. I used some Warm and White because that's what I had lying around. You will need to cut one 6.5" square of batting for each fabric square you have. So, I have 10 squares (2 covers, 8 pages) meaning I needed to cut 10 - 6.5" squares.
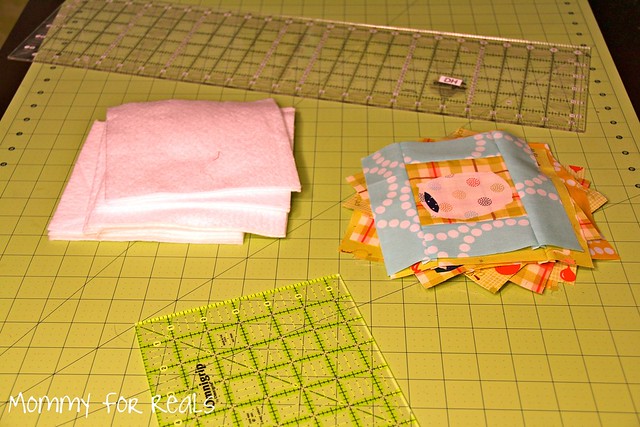
Grab those appliquéd framed squares and lay one on top of one piece of batting. You will now quilt the appliqué down. You know, through the batting AND the block. This will help hold the batting in place once the book is assembled.
Time to get those flaps attached to the book pages!
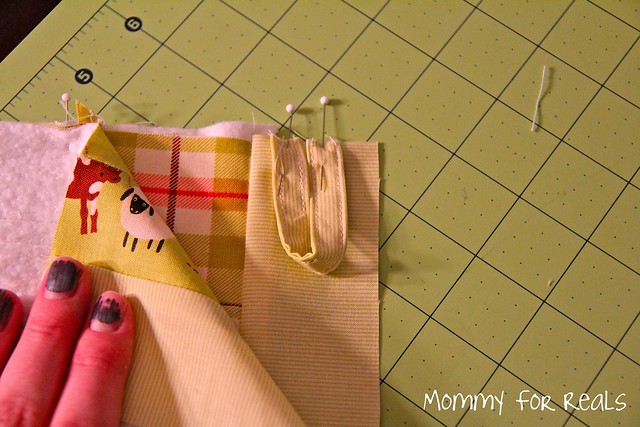
Place one flap face down and finger press down the edge about 1/2". Look at me! I should be a hand model!!

Pin the flap to the page so the folded part is face down on top of the appliquéd framed square block. Also, the fold should be pinned along the top border of the center square.
See the pins?
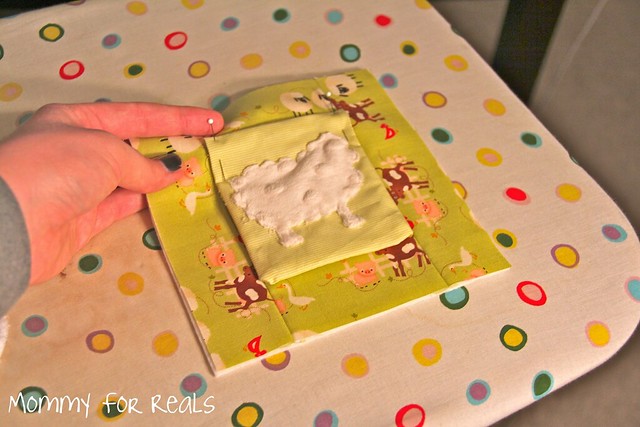
AND, the flap covers the appliqué. Perfect!!

Top stitch the flap to the page as shown in the picture below. I stitched just below the folded part so I couldn't see any fabric poking out when I lifted the flap.
Repeat until all the flaps have been connected to their appropriate pages.

This is long, I know. But stay with me!! Grab a diet coke! Almost finished!!
Now, onto the cover. If you don't like to embroider, you can always just write on the cover with a fabric pen. I chose to embroider the title because I like the texture. I used a backstitch for the whole thing and I just wrote directly onto the cover with a water soluble pen in my own handwriting. Easy peasy, lemon squeezy!
Make sure your farmer and his wife are stitched down before you start embroidering. You are going to want to know where they will sit prior to taking on the task of embroidering through batting!! Also, make sure you are a little more that a 1/4" from all the edges (at least) since you will be losing that space to SA when we complete the pages.

Don't know how to make french knots for the eyes? Hit up Wild Olive for the deets.
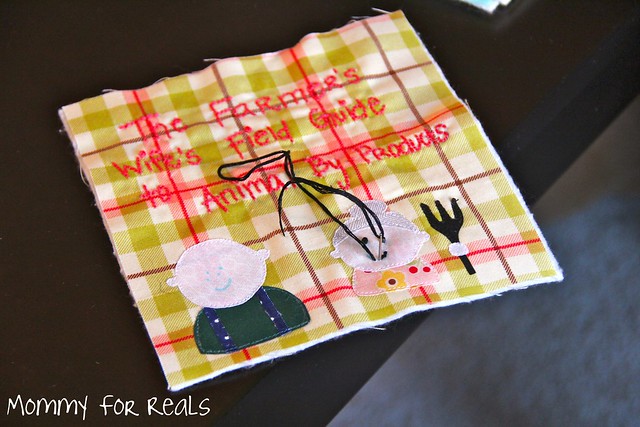
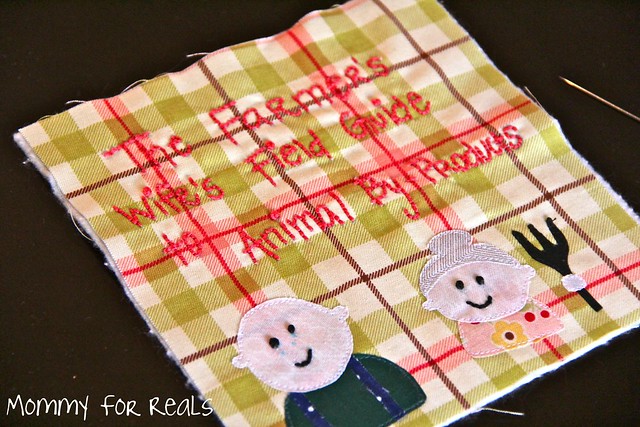
When you finish, spray the cover with water to remove the ink. See the extra set of eyes? That's not a mistake. I put those there for you! I swear. I never make mistakes.... Ha!
Lay your pages out and admire them!

Now, place them in a pile like you were actually looking at the finished book. (Cover face up on top. Page 1 face down below that. Page two face up below that. You get the idea.)

Ok. Now, take a second to visualize how this will be pieced together. The front cover and the back cover will be sewn together to create one large rectangle and the first page and the last page will be sewn together to create another large rectangle. Then we will sew those together to create the first and last completed pages. Need visuals? Yeah. I did too!
This is the top two squares of the pile (cover and page 1) and the bottom two pages from the pile (page 8 and back cover).

Make sure the pages are facing the right way. Sorry. I didn't think to take this picture until I was on to the next set of pages.

Now you will need to cut the binding. For this book, you will need 6 rectangles that measure 2" x "6.5". We will be sewing through all the binding pieces as our final step.

Using a walking foot, stitch one piece of binding face down onto one piece of the page. In other words, you are increasing each block by 2" when you add this strip to it.

Now, you will take the page that is OPPOSITE and stitch it to the other side of the strip, right sides facing. So here, we see the Sawtooth Star on top already stitched to the binding piece and below is the pig page.
You will end up with this:

Repeat these steps for the other pages. If you have an odd number of pages, you will end up with all your pages being put together like this (because when you add in the cover and back, it actually will make it even. Make sense?) I, however, did not think of this before hand and ended up with an even number of pages (and with the cover and back, that made it odd) so one of my pages will be alone and not paired with another page. Does that makes sense? Maybe not. Let me show you.
I was able to make two sets of the pages as mentioned above, but because I didn't have an odd number of internal book pages, I ended up with only two squares instead of four. If you run into this, you will stitch one piece of binding to the side that will become in the inside of EACH of these pages. They will not be long rectangles. They will not have a pair.

Ok. Now that THAT'S out of the way... let's move on.
Place your cover/back rectangle face up and your page one/page 8 rectangle on top of it face down. Pin. Stitch together on three sides. I started my stitch on the side I was going to leave open for turning, only stitching enough on that side to create a corner. Then I continued around the rectangle, turning corners with my needle down.


Leave the whole side open (minus the little bit to create your corners) for turning.

Cut the corners and flip. Pin the opening closed.

Topstitch around the entire perimeter of the rectangle, catching the pinned section to close it up. No hand sewing for me! No ma'am!!

Just so you know, I had to increase my top tension since I was essentially sewing through four layers of batting and two of cotton. You may have to do the same. Practice on a scrap first. That is, unless you really like unpicking!
Repeat these steps for the other large rectangle pages.
For the weird page that doesn't have a partner to make it a large rectangle, place the pieces right sides together and pin. This is where we are going to add that little loop at the top.
To make the loop, use a 1 3/4" x 4" strip of fabric.
Fold it in half, hotdog style and press. Open and fold the edges in to the center line and press.


Topstitch up each side.

Pin it to the binding section of the single pages. Make sure the loop is on the INSIDE, so that both right sides are facing it.
Topstitch around the edges leaving the binding side open for turning. Cut the corners and flip.
Here's what you have:

Last step: Lay the layers on top of each other and stitch right down the center. I used a zig zag stitch. Also, I stitched a zigzag stitch down the opening of the single pages too.
See the stitching in the center?
ANNNNNNNNNNDDDD.... You're finished! Congrats! You have an awesome new baby book!
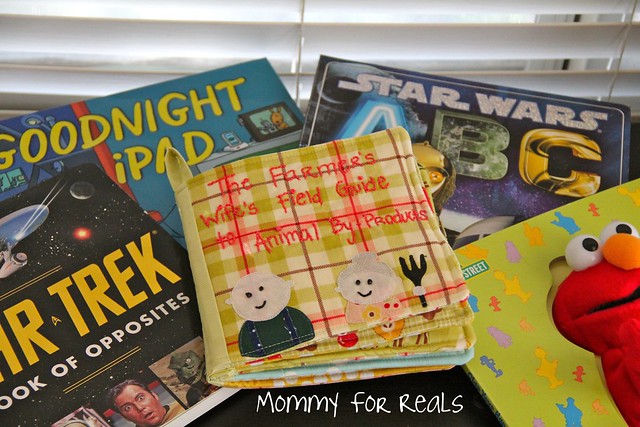
Doesn't it go great with the rest of Maze's collection?
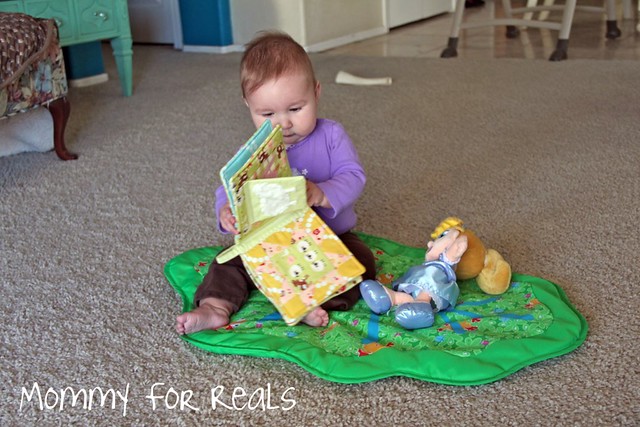
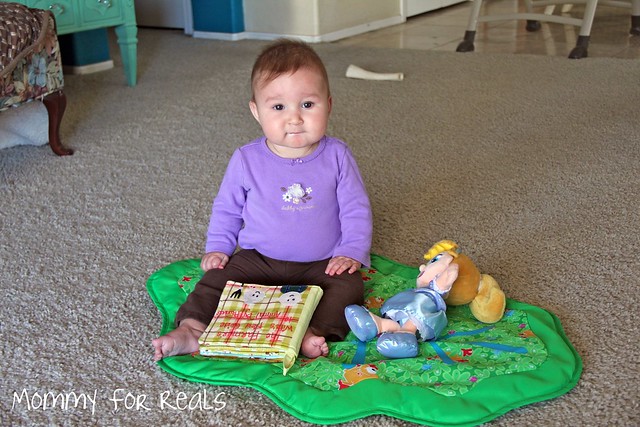
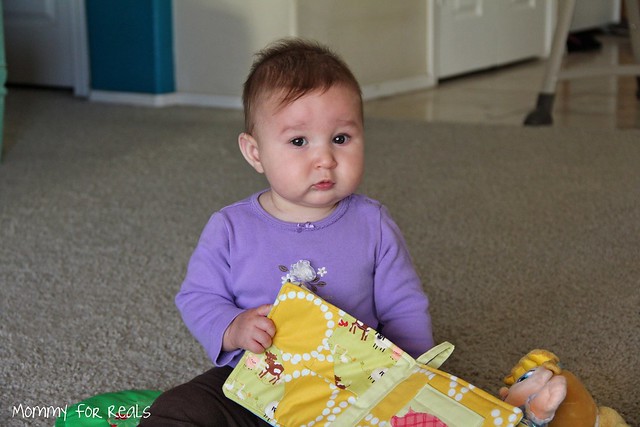

Bella wanted to get in on the action!

And Rory too.
Now, onto the contest! Yep! You heard right! CONTEST! MEANING PRIZES!!!

Inspiration and Tutorials from Designers
Blog Hop Week 1
March 4-Sunni is guest-posting on Jolly Jabber
March 5-Love Affair with my Brother
March 6-Craizee Corners
March 7-Lilypad Quilting
March 8-Love Affair with my Brother
March 9-Clover & Violet
Blog Hop Week 2
March 12-Mommy for Reals
March 13-A Colorful Life
March 14-It's Sew Kiki
March 15-Lilypad Quilting
March 16-Why Not Sew? Quilts
Blog Hop Week 3
March 19-Love Affair with my Brother
March 20-Echinops & Aster
March 21-Life's Rich Pattern
March 22-Ellison Lane Quilts
March 23-Love Affair with my Brother
Linky Party
Linky Party will be open from March 24-31 with 2 winners announced the next week. You can link up any project that is inspired by The Farmer's Wife Sampler Quilt and uses between 1-9 6" finished quilt blocks. The blocks do not have to come from the book.
Please link up a blog post or Flickr photo for your entry.
Judges
Laurie Aaron Hird, author of The Farmer's Wife Sampler Quilt
Michele Foster, Quilting Gallery
Sunni Bolger, Love Affair with my Brother
Prizes
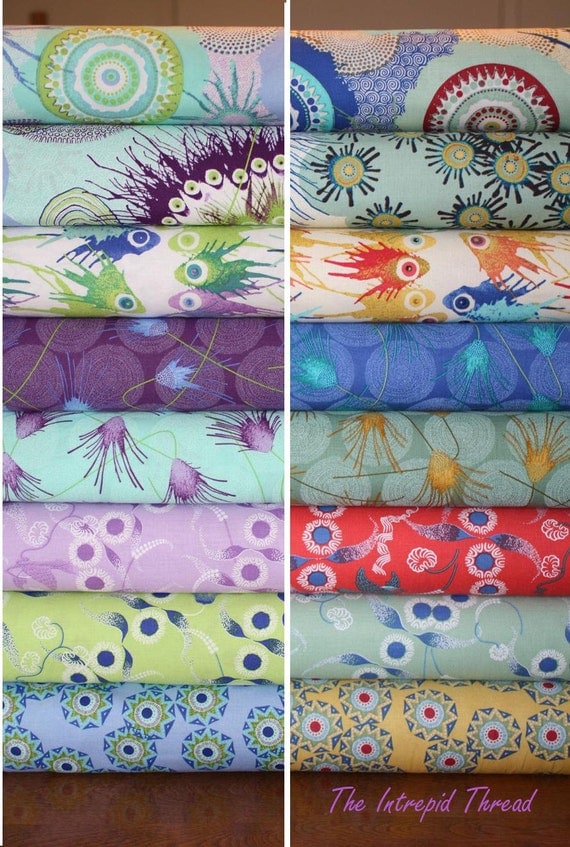
The Intrepid Thread is sponsoring a FQ bundle of the amazing Cosmos by Dan Bennett for Rowan.


Fat Quarter Shop is sponsoring a FQ Bundle of gorgeous Poetica by Pat Bravo for Art Gallery Fabrics.
I am so excited to see what you all make!

Holy crap, I LOST IT at "The horse becomes glue." This is hilarious and I love it! I've been wanting to get a cloth book for my 4 month old; now I guess I'll make one! Thanks for the tutorial! Your daughter is really cute :)
ReplyDeleteGAWD!!! I wish I was as funny as you. I LOVE it more than any baby item EVER. Really. I can't get over it. It is so great!
ReplyDeleteI cant wait to see the sequel - the Farmer's wife's guide to international cuisine... Frogs legs in france, monkey brains in china, satay dog in sulawesi, fruit bat in bali...
ReplyDeleteThat is just seriously too, too cute. And the baby pics are just adorable. Great job on the tute.
ReplyDeletekiera
It's Sew kiki
kiki-itssewkiki.blogspot.com
That is awesome Danny! Such creativity! So cute that Bella likes it!
ReplyDeleteThat. Is. Awesome. So hilarious, and just a little bit evil. Love!
ReplyDeleteAbsolutely perfect and hysterically funny all at the same time. Well done!!
ReplyDeleteOH. MY. GOD. that's SO funny! I love it, great tutorial as well! Made my Monday morning for sure!!
ReplyDeleteI have to admit it took my slow brain a minute to get the glue...then I started laughing hysterically! I'm still laughing! Job well done!
ReplyDeleteVicki @ Quilting Lodge
Awesome, funny and gotta-make-it, all at the same time! LOL I love this! Your little one is so precious, too! I know how much work it takes to put together one of these tuts - great job!
ReplyDeleteYou are one sick momma, but I love it!
ReplyDeleteso adorable!!!! thanks for the great tutorial. the pearl bracelets look awesome.... good job!
ReplyDeleteLol, I think the horse and pig may traumatise her for life, just add it to the list ;o)
ReplyDeleteThis is adorable and funny and such a great tutorial with pictures. Thank you!!
ReplyDeleteGreat tutorial! I was a little horrified at the glue, until I started giggling like mad!
ReplyDeleteOh my gosh! What an amazing tutorial you've done. How can thank you be enough when you had to have spent a very long time creating that for us but THANK YOU! Maybe if I scream it you'll know how much I LOVE this.
ReplyDeleteYour baby is just adorable and that dog (Bella?) appears to love your adorable daughter too. LOL
Am I confused though? I don't see anywhere to download the pdf for the animals and I cannot draw for anything so I would love that very much.
This book is hilariously cute! And for the poor horse and pig, harshly realistic. I love it! Great job!
ReplyDeleteNice tutorial. Love the model!
ReplyDeleteI love, love, love this book! It's hysterically adorable! So my sense of humor, and really everything IS better with bacon!
ReplyDeleteGreat Job!
This is absolutely adorable! I love it!!
ReplyDeleteAmazingly creative!
ReplyDeleteThat is the CUTEST thing eva!! When I have my second baby, I want one of those! Ya heard?!
ReplyDeleteSo cute!! It looked a lot smaller in the original picture, but together much larger. Love it!! The horse becomes glue that is so wrong!!
ReplyDeleteLove the baby book it is just the CUTEST thing ever and I so want to make it. Only thing is I can't find the PDF file you said you had for the animals cause I'm really, I mean REALLY bad at drawing. Thanks again I LOVE it.
ReplyDeletePatti xxx
This is hilarious, clever and just plain cute! Pinning so that I can make one :)
ReplyDeleteGorgeous gorgeous book Danny - and a beautifully clear tutorial!!
ReplyDeleteThanks for linking to a Round Tuit!
Hope you have a fabulous week!
Jill @ Creating my way to Success
http://www.jembellish.blogspot.com/
this is so cute. You came up with a really great idea!
ReplyDeleteLove the book and great tutorial! Thanks so much for having a brain that thinks of stuff like this and shows us :)
ReplyDeleteAwesome job!
ReplyDeleteMrs. Delightful
www.ourdelightfulhomeb.blogspot.com
I saw you on a link party. I LOVE this. It's adorable.
ReplyDeleteOh my, this is just fantastic!! I wish my daughter was young enough for one of these as I'm not sure I'd dare to gift one to someone else. The horse made me laugh for a full 5 minutes and confirms to my OH that I am indeed crazy!
ReplyDeleteThanks for the lovely, clear tute :)
This is the cutest!!! Your tutorial was fantastic. I just love seeing the book being used too! So sweet!
ReplyDeleteThis book is adorable!!! Love it!!!
ReplyDeleteThis is absolutely adorable!!! LOVE.
ReplyDeleteThis is why I need to learn how to sew...I love it!!
ReplyDeleteI love this! The peekaboo flaps are so cute :)
ReplyDeleteThis is fantastic!! I love it and it totally made me laugh. I like how you did the crinkle part to :)
ReplyDeleteWhat a beautifully made little quiet book!
ReplyDeleteThank you so much for sharing your talent and creativity on “A Little Birdie Told Me…” Tuesday this past week! It means a lot to have you be one of our birds of a feather! I hope the party has brought some good things your way.
Jenn/Rook No. 17
FANTASTIC tutorial!! Thanks so much for linking up at Live Laugh Linky! Hope to see you again this week :)
ReplyDeleteWow, what a fabulous tutorial. Great job!!
ReplyDeleteI wish I could pin this :( Why do you block your images? I'm expecting now and want to remember this for later.
ReplyDeleteLove this little book...blogged about it too. Way more went into making this than a little quilt...I am so impressed with this!
ReplyDeleteSO FUNNY! I will make this for some lucky child soon.
ReplyDeleteOMG thank you!!!! I'll make this for my child!
ReplyDeleteNot sure if you'll see this, but I hope you do.
ReplyDeleteBecause your daughter NEEDS these books in her life-
http://ecx.images-amazon.com/images/I/51Bf-RkNsJL._SX258_BO1,204,203,200_.jpg
http://ecx.images-amazon.com/images/I/51F3Ir7nabL._SX258_BO1,204,203,200_.jpg
Can't make the thumbnails show in this post.... Not tech savvy I'm afraid.
Are you serious??? A horse and GLUE?
ReplyDelete