


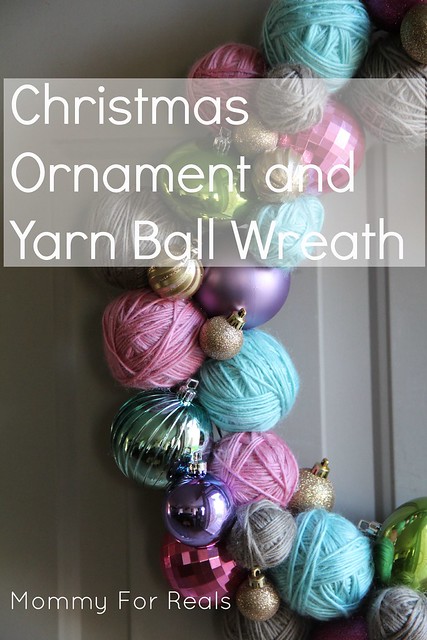
Last year I came across this image on Pinterest and immediately pinned it:

I fell in love. I mean, how could you not?! This is a gorgeous wreath. I knew I had to make one, so I raided the after Christmas sales last year stocking up on the supplies I needed to make this beauty.
Then this year, I pulled my Christmas decorations from the attic and rediscovered the things I had purchased to make this beast! And, since I'm on a handmade Christmas kick anyways with my #projectchristmasfy, I decided I needed to put this project on the short list of ones to finish this holiday season.

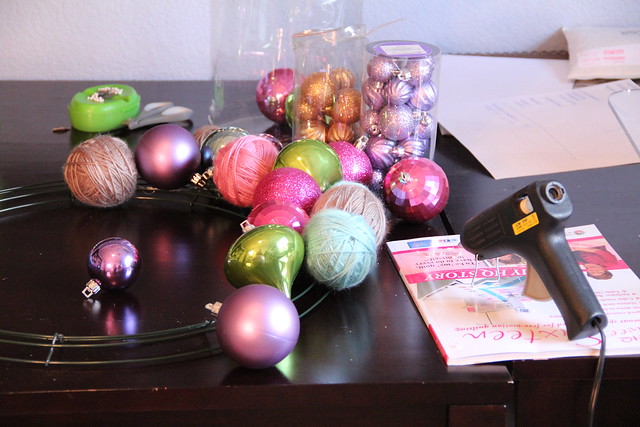
Supplies:
- various size styrofoam balls
- a few skeins of yarn
- Christmas ornaments (I chose shatterproof since I have a mischievous toddler)
- hot glue gun/glue
- straight pins
- wire wreath form
- scissors
I started with the yarn balls since they needed to be prepped before I could begin construction of the wreath.

Tie a knot in the end of your yarn and pin through the knot into the styrofoam ball. This will hold your yarn in place as you begin wrapping it around the styrofoam ball. When you have covered the ball completely, press an additional pin through the yarn strand before you cut the yarn away from the ball. This will hold your yarn in place so it will not unravel before you have time to glue it to the wreath.
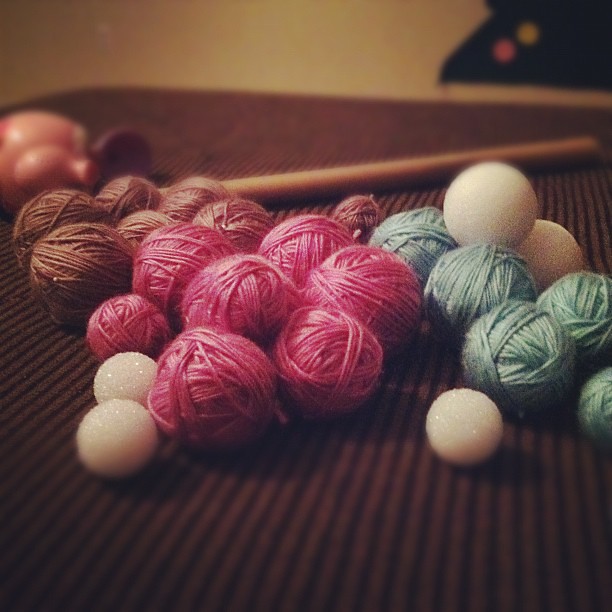
I wrapped all these while sitting on the couch catching up on Season 2 of Pretty Little Liars. It's fairly mindless work, but time consuming.
Don't you just love how yellow my pictures are when I'm working the midnight oil?? :)
After I finished watching my show and searched the internet for Season 3 episodes, which I didn't find, BTDubs, I went to bed. The following pictures are
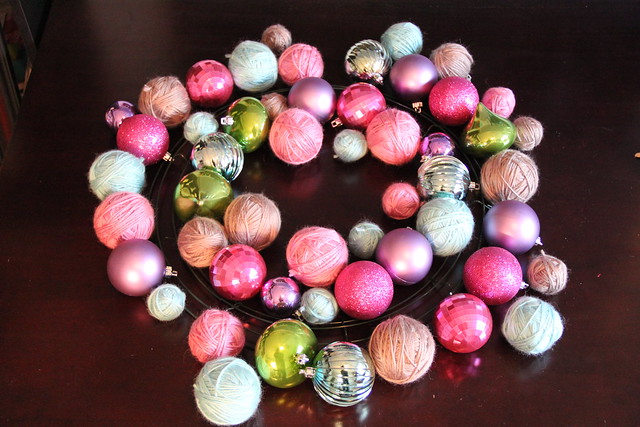
Lay out your form and the ornaments/yarn balls around it. It's good to have an idea of where you will be placing your balls (o.O) before you start gluing. It would be terrible to realize you've run out of all the pink ones before you even get half way around your wreath form!
Begin gluing your LARGE ornaments/balls in place, working your way around the wreath form. Make sure you glue the yarn balls with the exposed pin facing toward the wreath form. Don't worry about covering every little inch of the form. You will go back and fill in with the smaller ones momentarily. Make sure you designate the top of the wreath at this point. I just left the top of mine sparse so I could maneuver the wreath hook around the exposed wire. You may want to add a ribbon or twine. Something to hang the wreath with when you finish.
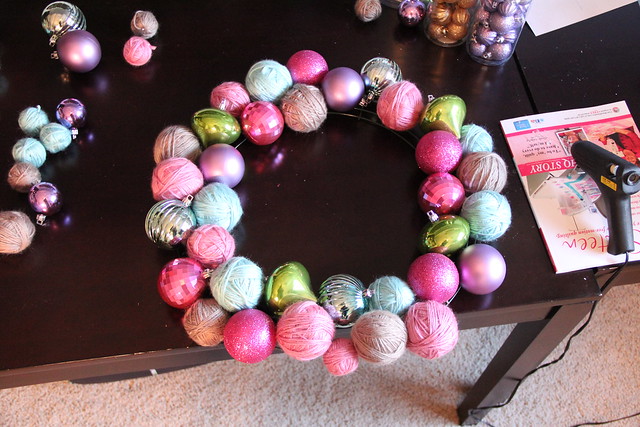
Once you've finished placing and gluing all your large ornaments/balls, carefully turn your wreath form over; face down.

As you will see, many of your ornaments have not adhered to the form completely. As you add more, they pull away. This is the moment where you will reinforce your work. Apply more glue to the ornaments where they touch the form. Carefully squeeze the glue gun between ornaments applying small amounts of glue to hold the ornaments to each other as well as the form. Continue all the way around the form. I chose a metal wire form because there were gaps that allowed for the curvature of the ornaments. I fear a solid foam or plastic wreath form may not be quite as forgiving, but if you choose to use one of the latter, please let me know. I'd love to hear how it works!

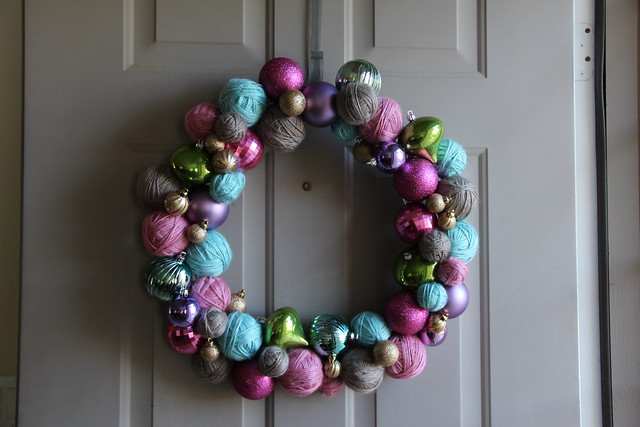
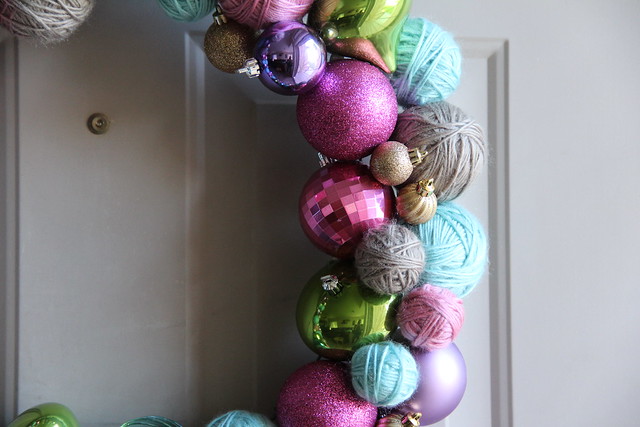
Once the hot glue has cooled, turn the wreath back over so the front is facing up and apply the smaller ornaments/yarn balls to fill in any gaps and cracks. Layer them. It's ok if you can only see a small part of an ornament shoved underneath another if it is providing cover for the form. You aren't going to want to see the form.
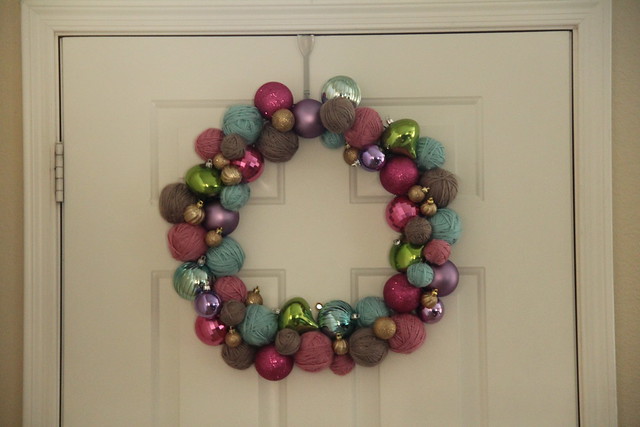
Now hang it up and enjoy!
I hung it on my front door when I finished, but I think I'll bring it in. I don't have to worry about the weather here in Arizona (it probably won't rain until February) but I worry it might get stolen!!
How's that for modesty? :)

A very easy make whose outcome I am super happy with!
And, as always, if you make something using one of my tutorials, please post it to the Mommy For Reals Flickr page. I would love to see your work!

Very cute!
ReplyDeleteBeautiful!! I just might have to make one next year to replace mine :)
ReplyDeleteWow Danny that's amazing - you did a wonderful job....and just think after Christmas you can take it all apart and knit yourself some socks!!
ReplyDeleteOh yes, you've nailed my biggest fear, running out of pink ones... ;o) It looks great though, and round here it would definitely be nicked!
ReplyDeleteDanny, I LOVE it! I teach middle school (junior high in US?) and this would be a great activity idea for our last week of school (next week, yeah!) activities week. Thank you for the idea and clear instructions.
ReplyDeleteAwesome!!! These looks great and colorful.
ReplyDeleteKids Games
Oh my goodness what an amazing and clever idea - I want one!!
ReplyDeleteLove it Danny! I just have to make one of those for next year. I have enough wool!
ReplyDelete